
How you begin something is always important. It’s important to relationships, to writing and to buildings. So it shouldn’t come as a surprise that it’s important to knitting as well. Maybe not as important as it is to buildings - lives are seldom lost to a bad cast on. But a knitters sanity might get fried. Today I want to introduce you to 4 fundamental cast ons every new knitter should learn. I will do a second installment with more specialized cast ons soon.
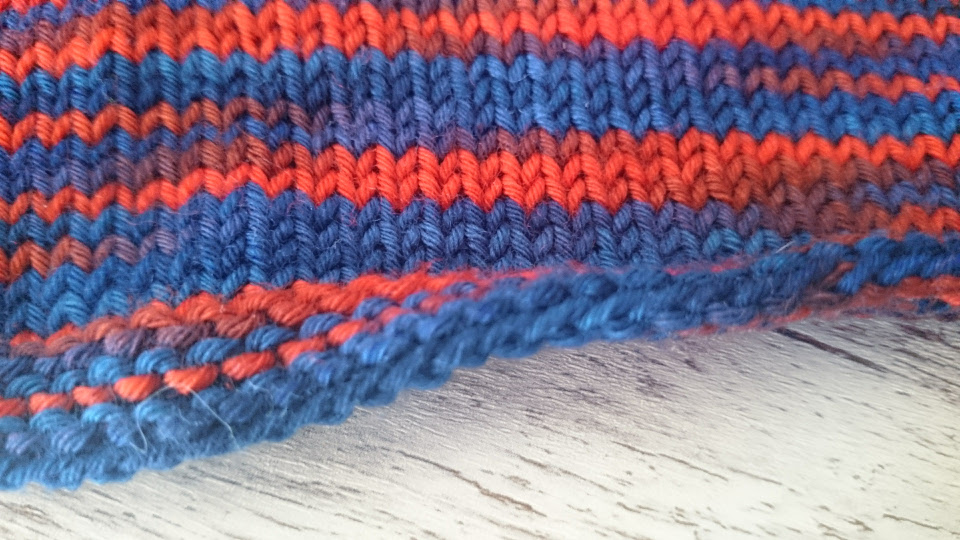
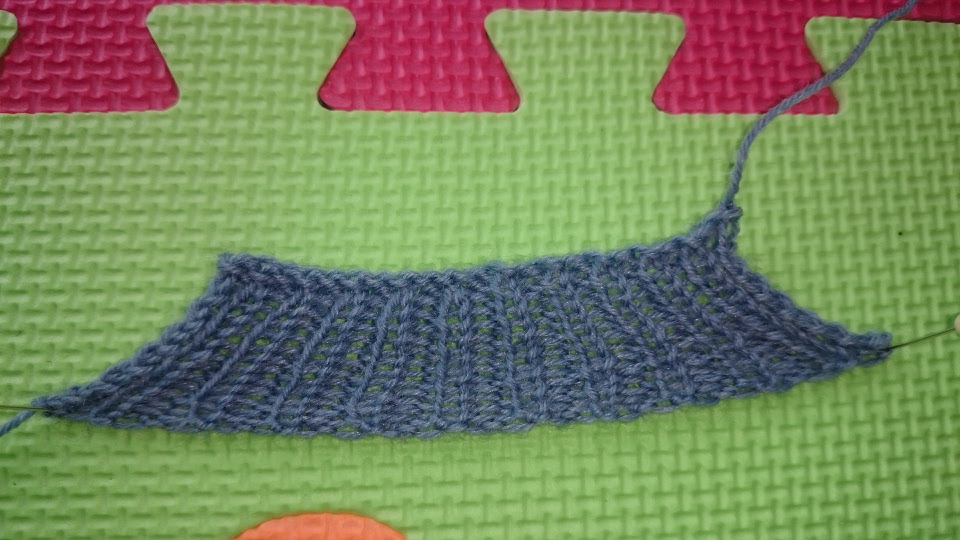
Long Tail Cast On (on a kid’s cardigan I need to repair)
Long Tail Cast On
This is the first cast on I’ve learned and the only one I knew for a long time. This is fitting since it’s also called the German Cast On and I happen to be German. Most knitters here learn it first. Most knitting books of my mother’s time taught this cast on first. It was the cast on I learned from my mom and the one they taught us in elementary school. It’s partly a regional thing I assume - as with continental knitting.
It’s versatile; you can use it for lace, cuffs, necklines, hats… Basically anything. And it looks nice. The cast on already counts (and looks like) a knit row, so it is advised to make the first row a wrong side row. For the longest time, I didn’t know this however and just happily started my projects with a right side row and the look never bothered me. I always liked what it looked like. And many projects start with ribbing where you wouldn’t really be able to see much of a difference anyway.
But it’s also versatile. You can use it for lace, cuffs, necklines, hats… Basically anything. And it looks nice. The cast on already counts (and looks like) a knit row, so it is advised to make the first row a wrong side row. For the longest time, I didn’t know this however and just happily started my projects with a right side row and the look never bothered me. I always liked what it looked like. And many projects start with ribbing where you wouldn’t really be able to see much of a difference anyway.
Problems with This Method
It has some give - if you are using yarn with a little elasticity it helps, too. But not a lot. I never noticed that until I tried knitting clothes for the wolflings. You need more elasticity to cuffs, necklines, and hems for small children because you will be assisting them. For me, that means my hand needs to be able to get into a sleeve at least partially. Also, the smaller the diameter you are knitting the less stretch you have. And young children often need more room in cuffs and such as you’d think. Their proportions are simply different, their heads too large, their wrists too thick in comparison. And don’t get me started on thumbs. They are always getting stuck somewhere. The Long Tail Cast On just doesn’t work well here, especially not when you are using yarn with little to no stretch to it.
Also, it seems complicated to many beginning knitters. There are many great tutorials, however. And like I said, elementary school children learn it here (or used to when I was that age, anyway). It really only seems difficult at first and once you get a nice rhythm down it’s a one of the quickest cast ons out there.
You have to estimate the length of the tail. There are many ways to do that. But the easiest ways are probably to simply use three to four times the width of your knitted piece or to use 1 inch of yarn for each stitch you need. Or you can do it like me and simply guesstimate - but I often end up with a too long tail. That is still better than a too short tail. That is a risk with this method and especially annoying when you are casting on hundreds of stitches. For those circumstances, you can cast on with two balls of yarn - one for the live yarn and one for the tail.
Backward Loop Cast On
This is probably the easiest cast on you will come across. (I think so anyway.) You are only using the working end of your yarn for it. That means you can use it to add stitches in the middle or end of a row. It’s a great cast on for the underarm of sweaters or the fingers of gloves. I like that it’s quite thin and doesn’t add a lot of bulk to seams. If you are casting on more stitches it has a bit stretch to it.
Problems with This Method
If you are casting on only a few stitches it doesn’t seem very stretchy to me at all. Therefore I would never use it for the cuff on a kid’s sweater. And it can be tricky to knit into the loops.
Also, it’s not easy to make it look even. That doesn’t matter much to me on the underarm of a sweater. At the hem that’s a different matter, though. Some knitters advise going down a needle size for the cast on to make it look cleaner. That will likely reduce the stretch of the cast on, however.
I personally find it can be difficult to make the transition between cast on and already existing stitches look nice. The stitches next to the cast on often stretch out a bit because they pull in more yarn of the cast on.
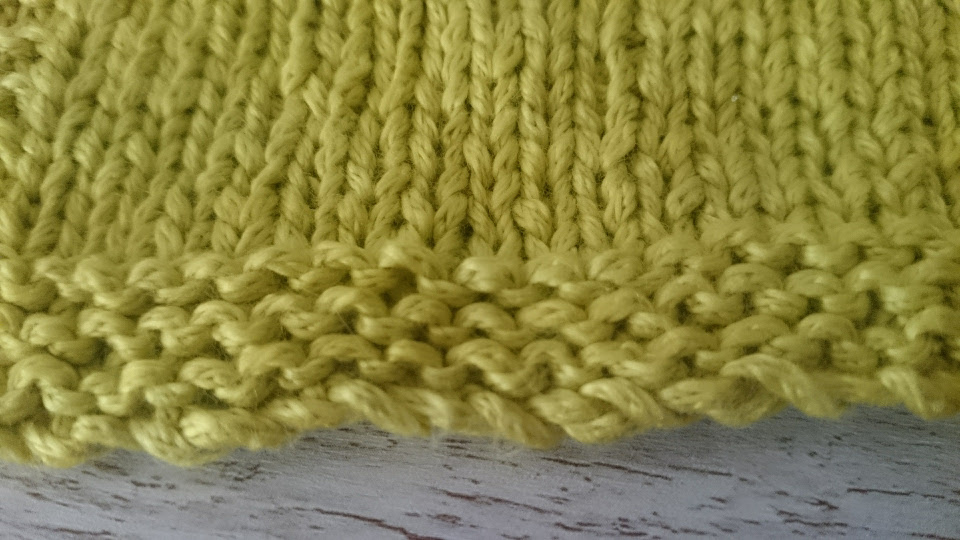
Knitted Cast On
This is also an easy cast on to learn. The name already says it really, all you’re doing is knitting on new stitches. The edge is rather firm with only a little elasticity but it can be pulled out of shape. That makes it a great cast on for lace. If you’re casting on loosely it even has a lace-like appearance. I think it looks very pretty.
Here you are again only using your working yarn, so you can also use this cast on for adding stitches mid row or at the end.
Problems with This Method
If you cast on loosely I would either avoid using it for buttonholes or cast on with a smaller needle. (This site has a good picture of a loose Knitted Cast On. You need to scroll down some.) Due to the lace-like appearance, you might otherwise have problems buttoning your sweater. Make a swatch first if you are unsure.
Cable Cast On
This method is similar to the Knitted Cast On. The only difference is you are not knitting into a stitch but between stitches. It is also a very easy cast on to learn and creates a pretty and firm edge. As with the two methods before it also a great cast on for within or at the end of a row. There is also an alternating Cable Cast On especially for ribbing but only use that where you don’t need the fabric to stretch (pillowcase, blanket, possibly underarm).
Personally, I love this cast on for buttonholes but you need to make sure your buttons will fit through the created hole well enough. So again, make a swatch if you are unsure.
Problems with This Method
The low elasticity can be a problem if you are using the cast on for a hem. If you are unsure if it will work, either make a swatch to try it out and check how much give you’ll have against how much you will need - or use a different cast on.
Tillybuddy’s Very Stretchy Cast On - I didn’t mention it here because I just tried this out on a swatch recently to see how stretchy it is. I will talk about stretchy cast ons in a future post!
Which cast on method do you use most? And for what and why? Would you add any method here that I may have overlooked? What else would you like to see here? Please let me know in the comments below.
That’s it for this week. I will try to finish another post for next week but it may be really short depending on how much time I actually end up having in between washing clothes, packing and entertaining kids. Come back for more soon! I promise you pictures of our vacation and my knitting once we come back and everything returns to whatever qualifies as normal in this wolf’s den.
Did you enjoy this post? Then please share it on Pinterest!