
 Some cast ons are pretty. Others are merely functional but not especially decorative. But what do you do if you want the cast on of (for example) a cuff to be invisible? There are two options. Option 1: A folded hem. That may work, but it is usually lacking a bit in elasticity and therefore better suited for the bottom of a sweater. Option 2: Tubular cast ons.
A tubular cast on has no visible beginning. The knitting just rolls around the edge. There are a couple of different ways to achieve this. Some may seem too fiddly or too much work for you. But they aren’t that hard to learn, and it ‘s nice to have at least one tubular cast on in your toolbox. You may come across a project in your knitting career where a tubular cast might just make the difference.
1 - Basic Tubular Cast Ons
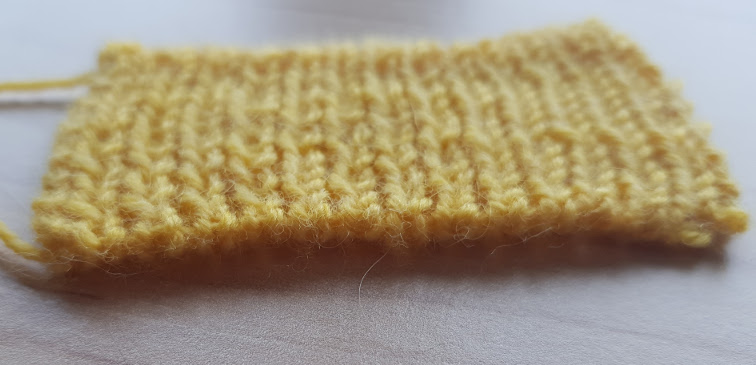
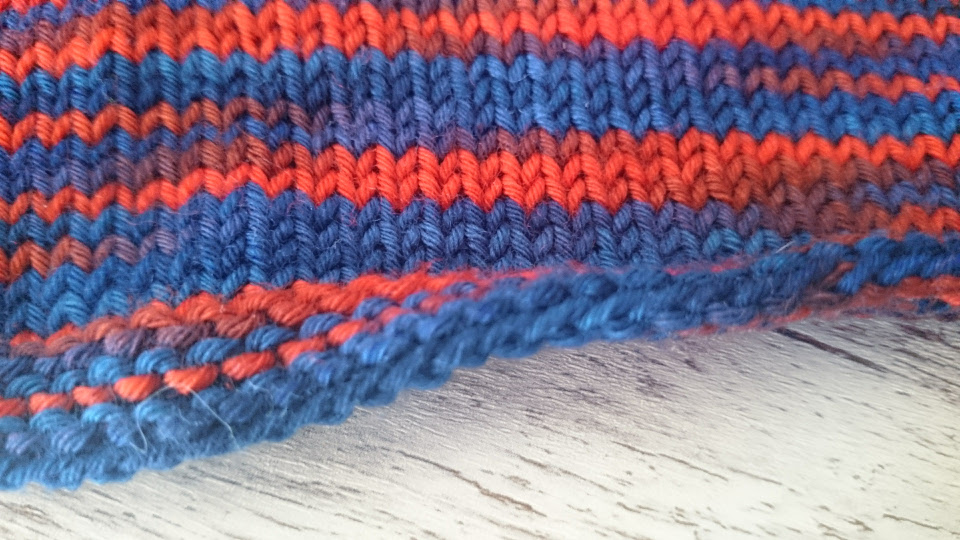
Basic Tubular Cast On
These cast-ons are very much like folded hems. You work no turning row, and you usually work a lot fewer rows before bringing the both edges together. And you don’t knit the two sides together but knit each stitch separately, 1 knit and 1 purl. That gives the fabric more stretch than the folded hem.
I find this difficult to explain without visual aid, but I had one of these in my earlier post about stretchy cast ons. It wasn’t precisely invisible but still gave a decorative edge.
You can also do this with a provisional cast on and a stockinette base. The stockinette base lets it blend in with the rest of the ribbing. There is a one described in “Cast On Bind Off” (*) by Leslie Ann Bestor (p. 120, Tubular Cast On). And there is another description here on the Twist Collective website (method 1). After a lot of searching, I even managed to find two different videos for it. It’s just hard to search for this cast on since it has no specific name.
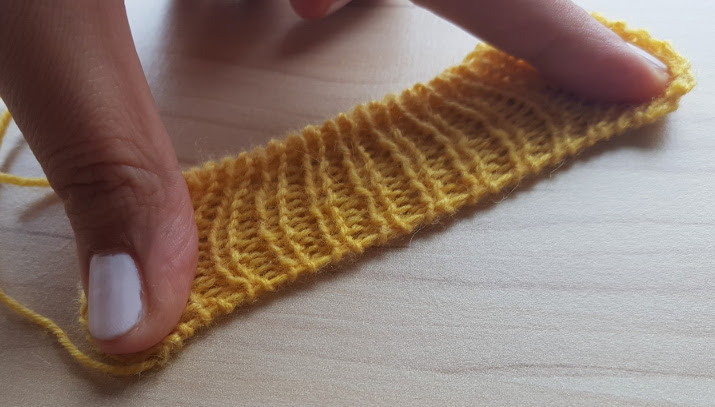
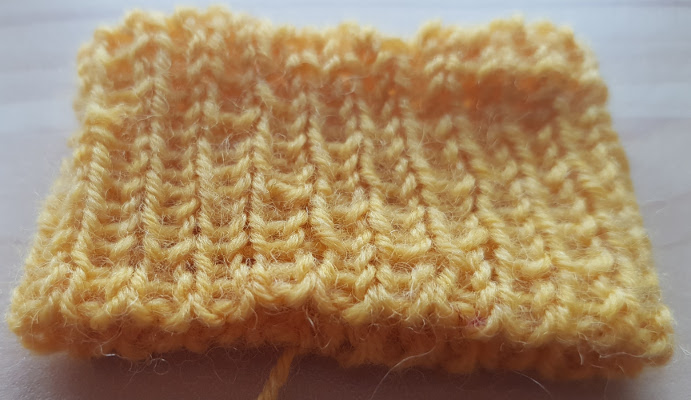
Basic Tubular Cast On stretched out
This type of tubular cast on is easy to learn and a lot less fiddly than some others. And they are the only ones for which you don’t need tubular knitting. It should also be possible to do them in the round, though I haven’t tried it yet. And it is a good base for any K1, P1 ribbing.
2 - Provisional Tubular Cast On

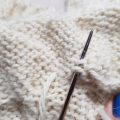
Provisional Tubular Cast On
The name of this cast on makes it easy to mistake it for one of the others. Except for the Italian Tubular Cast On, all of the ones I’ve tried started off with a provisional cast on.
The method I’ve tried I’ve found again in “Cast On Bind Off” (*). But I also managed to find a video that only has one small difference to what I did. I didn’t do a slipknot at the beginning but only knotted the two yarns together - not too tightly you want to be able to pull it out again. You place the knot over the needle in your right hand and hold it and then create the first stitch by going under the waste yarn over your thumb. The rest is the same.
This method incorporates tubular knitting, where you slip the purl stitches with the yarn in front. You do this create two sides of the knitting similar to double knitting, just that you are only knitting one side at a time here. Remember this for tubular bind-offs and other tubular cast ons. It’s also helpful to understand how this works if you want to work a tubular cast on or bind off in the round.
This cast on can’t be worked in the round. (At least I haven’t figured out how. If you know how to do it in the round, let me know in the comments, please!) But you can work it in K2, P2 ribbing. For that, you finish the four tubular knitting rows and then rearrange the stitches on the needle so that you always have to knit stitches and two purl stitches next to each other. The Twist Collective also has a description of how to do that (scroll down to “Knit-two-purl-two patterns (ribbing, moss stitch, reversible cables, etc.)”). You can use this for all of the following tubular cast on methods.
3 - Yarnover Tubular Cast On
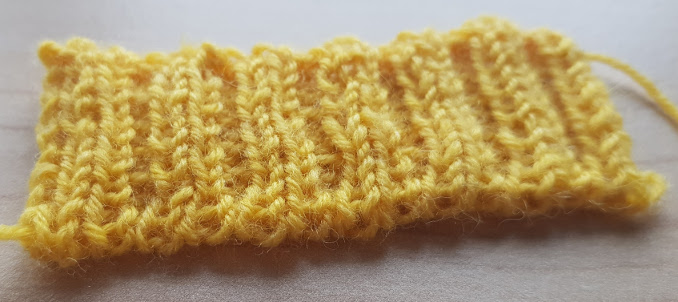
Yarnover Tubular Cast On 2×2
This was my favorite tubular cast on. It’s easy and quick to work and to remember. You cast on half as many stitches as you need with waste yarn and then only repeat K1, yo to the end of the first row. And then it’s back to tubular knitting as explained above. Here is a video of this cast on.
Yarnover Tubular Cast On in the round
And you can work this in the round as well. Tubular knitting in the round works slightly different, though. The first row if knitting the knit stitches and slipping the purl stitches with the yarn in front remains the same. But the next row would then be slipping knit stitches with the yarn in the back and purling the purl stitches.
4 - Italian Tubular Cast On

Italian Tubular Cast On 2×2 (unblocked, one of the wolflings hid it under my keyboard for some reason)
This was the first tubular cast on I’ve ever tried many years ago. And I thoroughly hated it. It was too fiddly on circulars and the instructions I had said you couldn’t work it in the round. The same book also referenced this as the only stretchy cast on suitable for socks. And you would have had to sew the tubular part closed which would have reduced the flexibility. Not all instructional sources out there are right.
You can indeed work in the round with this cast on without sewing it up afterward. After the cast on you use the same method of tubular knitting as described above.
Some people prefer this cast on because you don’t need any waste yarn for it. I still find it fiddly, though and personally don’t like this cast on very much. Especially if I cast on so many stitches that they slide onto the cable of the circular, it just becomes a mess that is impossible to make sense of. At least for me. It might be easier to work with thicker yarn, but I’ve never tried. I would rather just use a different tubular cast on.
Bonus: 2 Tubular Bind-Offs
I’ve found two tubular bind-offs that were quite similar. For both versions, you should do two to four rows of tubular knitting first just to make it look a little neater. Both bind-offs use the Kitchener stitch, and you can use it for both K1, P1 and K2, P2 ribbing and in the round or flat.
Version 1, I find a bit easier. You need to rearrange the stitches on the needles so you have all purl stitches on a needle in the back and all knit stitches on a needle in the front. And then you just graft or Kitchener the stitches together.
For version 2, you don’t rearrange the stitches but still graft the knit stitches to the purl stitches. It wasn’t so much harder to do, but it was a lot trickier to get the bind-off to look neat. And it can be harder to wrap your head around it.
There are more versions of the same thing out there. Some people even drop stitches off before they finish grafting them. I find that makes it just much more confusing and it’s much harder to see what you are doing.
Conclusion
I’ve found no real difference in flexibility between the four tubular cast on methods mentioned above. And they all give you pretty much the same edge. It’s a simple matter of preference which method you’ll use in the end.
Most of my bind-offs looked messy. The last one looked the best, so I would advise practicing that for a while first. Also, I didn’t like the look of the K2, P2 ribbing. The cast on edge looked alright, but it felt tighter in comparison, and the bind-off didn’t look as nice as for K1, P1 ribbing. That might simply be the lack of practice, though.
So which tubular cast on did like the most? Do you prefer any other method that I may have left out? For what type of project or edge do you use a tubular cast on? Please let me know in the comments below.
- Cast On Bind Off (*) by Leslie Ann Bestor
- Cast On, Bind Off: 211 Ways to Begin and End Your Knitting (*) by Cap Sease
On top of that Craftsy has a class on the subject of cast ons and bind offs that is worth watching: 40 Ways to Cast On & Bind Off with Aurora Sisneros (*). And besides searching on Youtube and Google you can always check out Very Pink Knits. They have a large library of knitting technique videos.
If we ever get out of the infinite-seeming “autumn sickness loop” I may get more done than just write a blog post each week. I do hope you liked this post. I hope to see you all again soon on this blog! And if you want to read more of my posts on cast ons and bind offs here are a few links:
- Knitting Fundamentals: 4 Basic Cast Ons You Need to Know
- 7 Beautiful & Stretchy Cast Ons You Need to Know
- 6 Quick & Easy Stretchy Bind Offs You Need to Know
Affiliate disclaimer: This post contains affiliate links (links marked by (*)). That means that at no extra cost to you I will receive a small compensation should you choose to purchase after clicking on such a link. Please, read this for more details.
Did you enjoy this post? Then please share it on Pinterest!